
Hive Thermostat Screwfix Guide: Installation & Tips 2026
Smart heating controls are rapidly transforming UK homes, with more households seeking energy-efficient solutions as we approach 2026. The hive thermostat screwfix is at the forefront of this trend, offering both convenience and significant cost savings.
This guide delivers a clear, step-by-step approach to installing and optimising your Hive Thermostat, whether you are a hands-on DIYer or a homeowner seeking professional results.
You will discover the key features of Hive Thermostats, learn how to choose the right model at Screwfix, and follow a detailed installation walkthrough. Troubleshooting advice and expert optimisation tips are also included to ensure you get the best performance.
Ready to upgrade your comfort and lower your bills? Let’s explore how to make the most of your hive thermostat screwfix.
Understanding the Hive Thermostat: Features & Benefits
The hive thermostat screwfix has become a leading smart heating solution in the UK, thanks to its blend of innovation and practicality. Since its introduction, Hive has consistently evolved, offering homeowners a smarter way to control their heating. Initially, smart thermostats were a niche addition, but by 2026, they are a popular choice for those seeking both convenience and energy savings.
What is the Hive Thermostat?
Hive thermostats, available via hive thermostat screwfix, have shaped the UK smart heating market for over a decade. These devices allow users to control their home’s temperature remotely, create custom schedules, and seamlessly integrate with other smart home systems.
Homeowners can choose between wireless and wired Hive models. Wireless versions are ideal for flexible installations, while wired options suit homes with existing thermostat wiring. The intuitive interface features a clear digital display and tactile controls, making adjustments straightforward for all users.
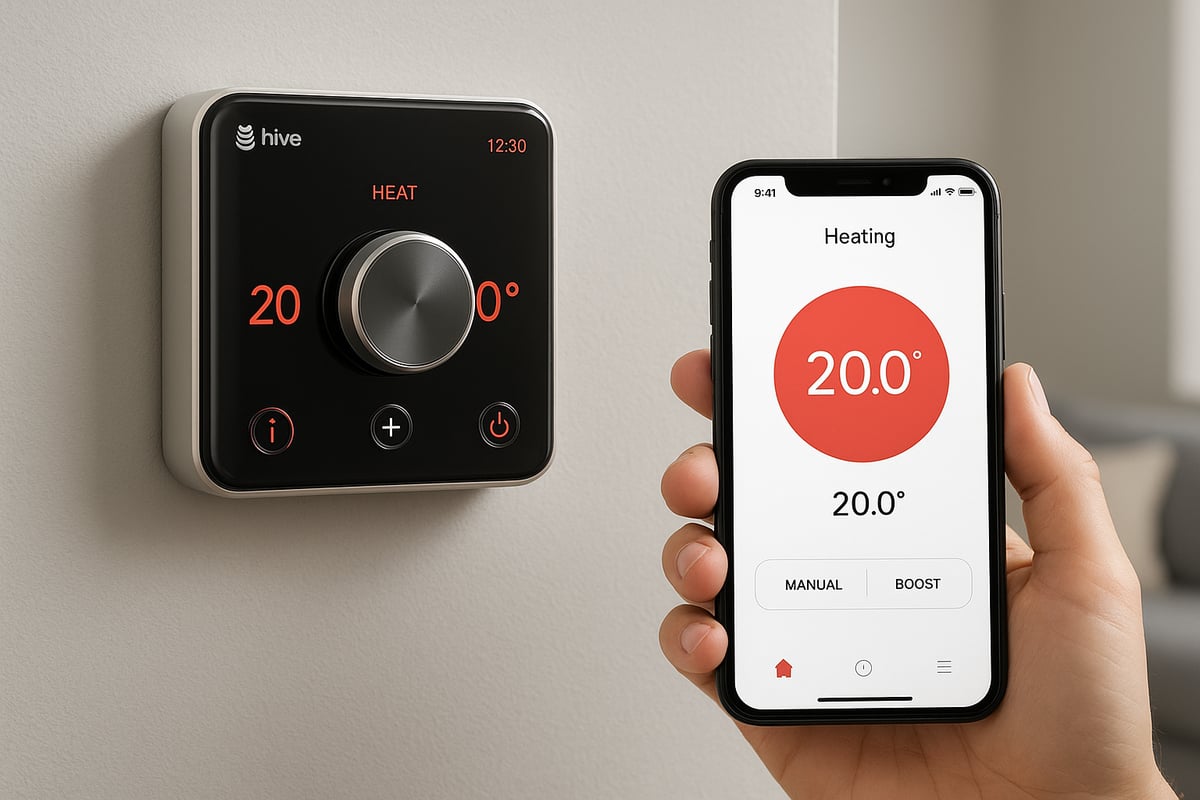
The Hive mobile app extends control even further. Users can adjust temperatures, set schedules, and receive notifications from anywhere. Advanced energy-saving algorithms and adaptive learning automatically fine-tune heating based on household routines, helping to lower bills without sacrificing comfort.
Hive thermostats are designed for compatibility with Amazon Alexa, Google Assistant, and Apple HomeKit, allowing for voice commands and integration into broader home automation routines. For example, a typical family in a semi-detached home can see a notable reduction in heating costs by using Hive’s smart scheduling and remote features.
| Hive Model Type | Connection | Key Features | App Control |
|---|---|---|---|
| Wireless | Wi-Fi/Zigbee | Flexible placement, batteries | Yes |
| Wired | Direct | Reliable power, fixed location | Yes |
Key Benefits for UK Homeowners
Choosing a hive thermostat screwfix brings a suite of advantages designed for modern living. Energy efficiency is at the forefront, with UK government data showing that heating makes up over 60% of domestic energy use. Hive’s intelligent controls help cut this figure by optimising schedules and reducing waste.
Enhanced comfort is another standout benefit. Personalised heating schedules ensure every room stays at the ideal temperature, while remote access means you can adjust settings on the go. Integration with additional smart devices enables automation, such as heating adjustments triggered by occupancy sensors or geofencing.
Safety features like frost protection and holiday mode offer peace of mind, especially during colder months or when away from home. The environmental impact is also significant, as reducing unnecessary heating helps lower your carbon footprint.
Many UK homeowners have reported high satisfaction rates with Hive. According to recent studies, a large proportion of users experience tangible cost savings and improved comfort. For a deeper look into the real-world impact and potential savings, see this analysis on Energy Savings from Smart Thermostats.
By choosing hive thermostat screwfix, you gain reliable technology, ongoing support, and a future-ready approach to home heating. Whether for DIY installation or professional setup, Hive continues to set the standard for smart climate control in the UK.
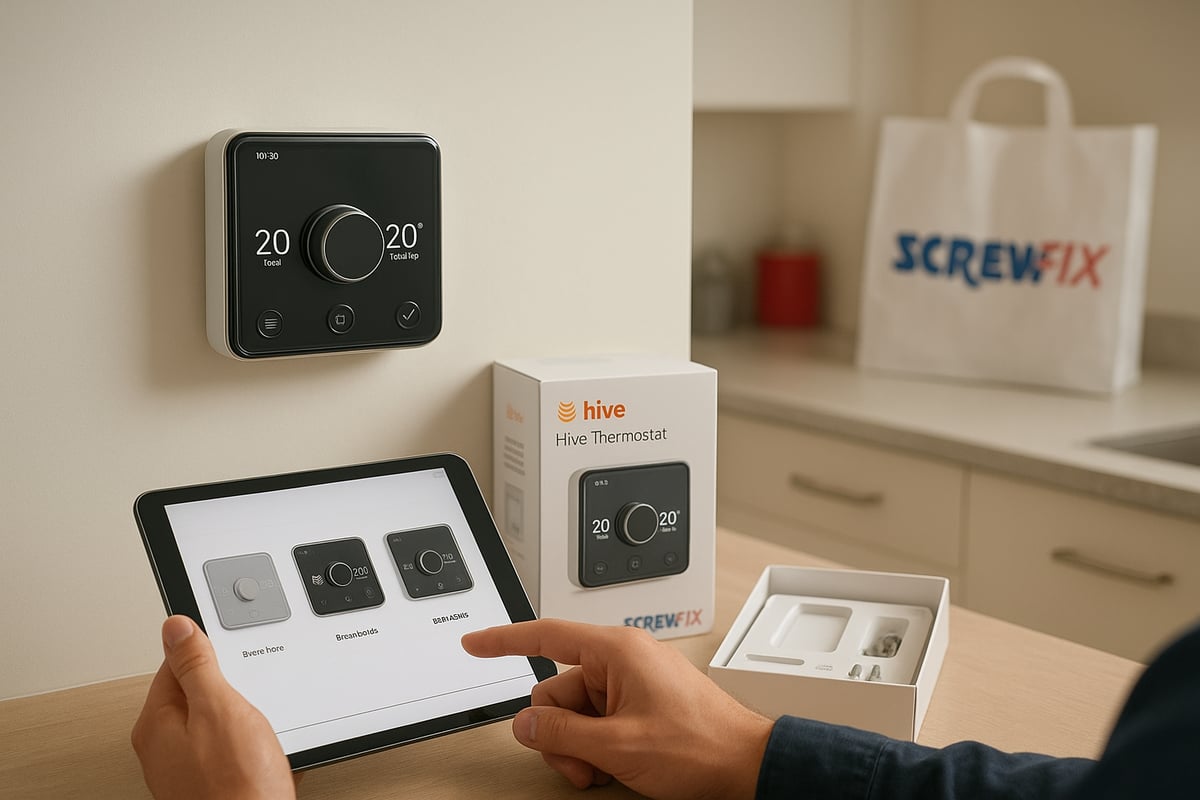
Choosing the Right Hive Thermostat at Screwfix
Selecting the ideal hive thermostat screwfix option for your home is crucial to maximising comfort and energy savings. With a variety of models and features available, understanding compatibility and purchase considerations ensures you make a confident, futureproof investment.
Product Range and Compatibility
In 2026, the hive thermostat screwfix selection covers an impressive range, catering to various property types and heating systems. The main models include single zone units, ideal for standard central heating, and multi-zone versions, which allow precise temperature control in different areas of the home. Each is available in wired and wireless formats, giving flexibility for both new builds and retrofit projects.
When choosing your hive thermostat screwfix, start by considering your boiler type. Combi boilers pair well with most Hive models, while system and conventional boilers may require additional receivers or accessories. Wireless thermostats are popular for their straightforward installation and minimal disruption, whereas wired options suit homes with existing wall cabling.
Compatibility is essential. Check that your heating system is supported, ensure reliable broadband for smart features, and confirm your preferred smart ecosystem, such as Alexa, Google Assistant, or Apple HomeKit, is compatible. For technical details, refer to the Hive Thermostat Installation Guide.
For example, a typical semi-detached home in Kent with a combi boiler and good Wi-Fi signal would benefit from a Hive single zone wireless kit. This provides the convenience of app-based remote control and easy integration with voice assistants.
Buying Considerations and Screwfix Advantages
When evaluating the hive thermostat screwfix range, price and value for money are key. Screwfix often features competitive pricing, regular promotions, and bundled starter kits that include everything needed for installation. Warranty terms are clear, typically offering two years cover, with hassle-free returns if required.
Screwfix stands out for its accessible customer support, both online and in-store. Installation kits and compatible accessories, such as smart radiator valves or additional hubs, are widely available, making it easy to customise your system as your needs evolve.
Customer reviews on the Screwfix platform provide valuable insights. Many users highlight the ease of installation and the intuitive Hive app as standout benefits. For those who prefer seeing products firsthand, in-store visits offer the advantage of direct comparison, while online purchases provide convenience and quick home delivery.
Choosing between in-store and online depends on your preference for immediacy or research time. Both options ensure you receive genuine products with full support, making hive thermostat screwfix a reliable choice for UK homeowners aiming to futureproof their heating.
Preparing for Installation: Tools, Safety, and Planning
Before starting your hive thermostat screwfix project, thorough preparation is vital for a smooth and safe installation. Understanding the correct tools, materials, and planning steps can make the difference between a hassle-free experience and unnecessary setbacks. Whether you are a seasoned DIYer or a homeowner considering professional help, investing time in preparation ensures your smart heating upgrade goes as planned.
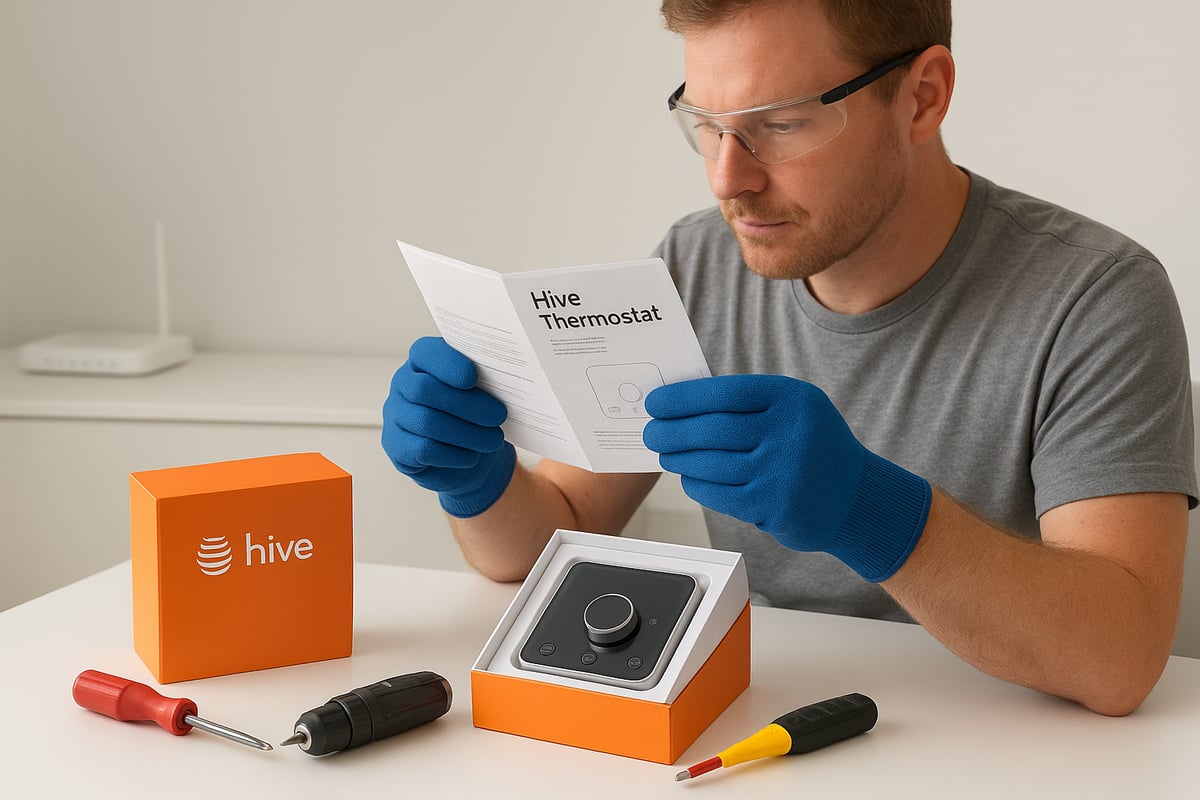
Tools and Materials Checklist
Gathering the right tools and materials is the first step for a successful hive thermostat screwfix installation. Having everything at hand minimises interruptions and helps maintain a safe working environment.
Essential Tools:
- Insulated screwdriver (flat and cross-head)
- Electric drill with masonry and wood bits
- Spirit level for accurate mounting
- Voltage tester for electrical safety
- Wire strippers for clean connections
- Pencil and tape measure for precise placement
Materials Needed:
- Hive Thermostat kit (thermostat, receiver, hub)
- Backplate and mounting screws
- Batteries (for wireless models)
- Rawl plugs for solid walls
Safety Equipment:
- Insulated gloves
- Eye protection goggles
Example: Complete DIY Toolkit
| Item | Purpose |
|---|---|
| Screwdriver Set | Securing terminals |
| Drill & Bits | Mounting backplate |
| Voltage Tester | Confirming power is off |
| Wire Strippers | Preparing cable ends |
| Spirit Level | Ensuring straight installation |
| Gloves & Goggles | Personal safety |
Ensuring you have all these items before you begin your hive thermostat screwfix project saves time and helps avoid unnecessary risks. Double-check your toolkit before starting to prevent any last-minute supply runs.
Safety Precautions and Legal Requirements
Safety must always come first in any hive thermostat screwfix installation. UK regulations, such as Part P of the Building Regulations, require that electrical work in homes is performed safely and, in some cases, certified by a qualified professional. If your installation involves any work near gas appliances, ensure a Gas Safe registered engineer handles the task.
Always switch off power at the consumer unit before touching any electrical wiring. Use a voltage tester to confirm circuits are dead before proceeding. Carefully read the instructions for both your old and new thermostats, and label all wires during removal to avoid confusion.
In many cases, DIY installation is possible, especially with modern wireless Hive models. However, if you are uncertain about wiring, or if your system is non-standard or involves complex boiler controls, hiring a professional is the safest choice. Remember, improper installation can void warranties and pose safety hazards.
A common pitfall is rushing through steps or overlooking safety checks. For a deeper look at errors to avoid during installation, see this post on common mistakes with smart thermostats.
By taking these precautions, you ensure your hive thermostat screwfix upgrade is both safe and compliant with UK standards.
Planning Your Installation
Strategic planning can transform your hive thermostat screwfix installation from a challenge into a straightforward task. Start by deciding where to place the thermostat. Choose an interior wall, away from direct sunlight, radiators, or draughts, for accurate temperature readings.
Check the strength of your Wi-Fi signal at the intended location. The Hive system relies on a stable connection for remote access and app integration. If the signal is weak, consider moving your router or using a Wi-Fi extender.
Prepare your boiler and heating system by reviewing the compatibility checklist included in your Hive kit. Ensure the system is switched off and cool before you begin. Completing a pre-installation checklist helps avoid missing steps.
Pre-Installation Checklist:
- Confirm compatibility of your heating system
- Gather all necessary tools and materials
- Switch off power at the consumer unit
- Read through the full installation guide
- Assess Wi-Fi strength at thermostat location
- Allocate 1–2 hours for DIY installation, or 30–60 minutes for a professional
By following these planning steps, you set the stage for a successful hive thermostat screwfix installation, ensuring your smart heating system operates smoothly from day one.
Step-by-Step Hive Thermostat Installation Guide
Upgrading to a smart heating system can feel daunting, but with a careful approach, the process is straightforward. This step-by-step hive thermostat screwfix installation guide walks you through every stage, ensuring a safe and effective setup.
Whether you are a DIY enthusiast or a homeowner seeking clarity before hiring a professional, following these steps will help you achieve the best results. Let us begin with the removal of your old thermostat.
Removing the Old Thermostat
Start by switching off power to your heating system at the consumer unit. This is crucial for safety. Use a non-contact voltage tester to confirm there is no electricity running to the thermostat wires.
Next, carefully remove the front cover of your existing thermostat. Loosen the terminal screws and gently disconnect each wire. As you remove them, label each one clearly using small stickers or masking tape. This step is vital for identifying connections later in the hive thermostat screwfix installation process.
Typical UK heating systems use the following wire colours:
| Wire Colour | Typical Function |
|---|---|
| Red | Live |
| Blue | Neutral |
| Yellow/Green | Earth |
| Black | Switched Live |
However, always refer to your specific wiring diagram, as colours can vary in older properties.
Keep the old backplate attached until you are ready to fit the Hive backplate. This minimises exposure of live wires. Remove any screws and gently pull the backplate away from the wall. If you encounter unfamiliar wiring or signs of damage, consider consulting a professional before proceeding with your hive thermostat screwfix upgrade.
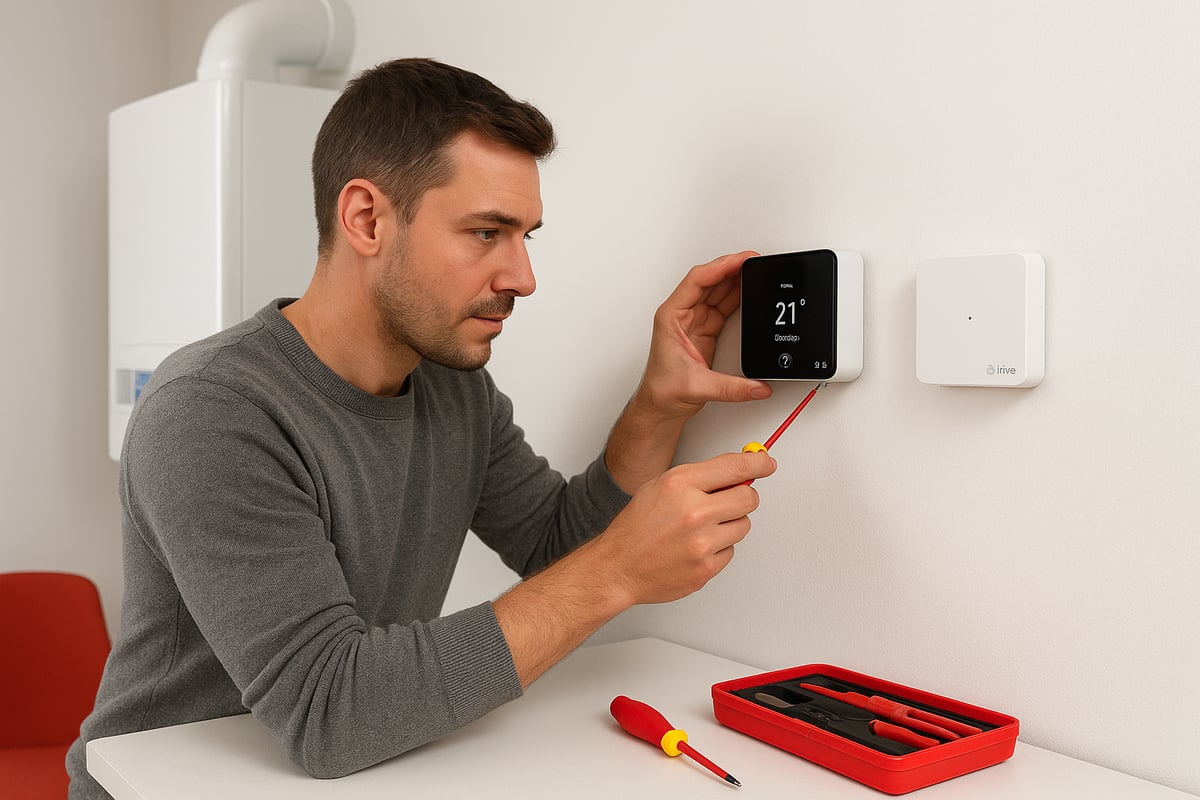
Installing the Hive Receiver
The Hive receiver should be installed near your boiler, ideally within 30cm, to ensure a strong connection. Confirm the boiler is still isolated from power.
For combi boilers, connect the receiver to the live, neutral, and switched live terminals, following the included wiring diagram. For system boilers with separate hot water control, additional terminals may be used. Tighten all screws securely.
Once wired, fix the receiver to the wall using the provided screws. Double-check all connections before restoring power. The receiver’s indicator lights should illuminate, confirming a successful power supply.
If you are unsure about the wiring, refer to the diagrams in the Hive manual or check online resources for common UK setups. Accurate wiring is essential for the hive thermostat screwfix system to operate safely.
After installation, keep the area tidy and free from obstructions. This ensures future maintenance is easy and helps prevent overheating of the receiver.
Mounting and Wiring the Thermostat
Decide on the best location for your Hive Thermostat. It should be positioned away from direct sunlight, radiators, or draughts, ideally about 1.5 metres above floor level.
Secure the Hive backplate to the wall, using a spirit level for accuracy. For solid walls, use wall plugs; for plasterboard, select suitable fixings. Feed the labelled wires through the backplate, then connect each one to the correct terminal as per your wiring notes.
Attach the thermostat unit to the backplate. For wireless models, insert fresh AA batteries into the compartment. The display should power up, indicating readiness.
Mounting on a stable surface prevents vibrations and ensures accurate temperature readings. For the hive thermostat screwfix installation, always double-check that no wires are pinched or exposed.
If you encounter uneven surfaces or hidden pipes, take extra care drilling holes. Consider using a pipe and cable detector for added safety.
Pairing the Hive Thermostat with Hub and App
Now, set up the Hive Hub near your broadband router. Connect it using the supplied Ethernet cable and wait for the indicator lights to show a stable connection.
Download the Hive app on your smartphone or tablet. Create an account, then follow the app’s instructions to add your new device. During setup, the app will prompt you to pair the thermostat with the receiver and hub.
Ensure your Wi-Fi signal is strong at the thermostat’s location. If pairing fails, move the hub closer or check for local interference. Most hive thermostat screwfix installations complete pairing within minutes.
Once paired, the app will guide you through basic settings, such as scheduling and temperature preferences. If you encounter persistent connection issues, consult the troubleshooting section or Hive’s support resources.
For those budgeting for professional help, the Hive Thermostat Installation Cost Breakdown offers a detailed overview of potential expenses.
Final Checks and System Test
With installation complete, it is time to test your new hive thermostat screwfix system. Power up the boiler and thermostat, then set the heating to a comfortable temperature.
Listen for the boiler firing up and check that radiators begin to warm. Use the app to adjust settings, ensuring all zones respond correctly. Test scheduled heating periods and manual overrides to confirm system responsiveness.
If the heating does not activate, recheck wiring and receiver placement. Review the app's diagnostic messages for guidance. Most issues are minor and can be resolved with a quick adjustment.
Once satisfied, tidy up all tools and store your installation manual for future reference. Your hive thermostat screwfix setup is now ready to deliver smart, efficient heating tailored to your needs.
Common Installation Issues & Troubleshooting
Installing a hive thermostat screwfix can be straightforward, but challenges sometimes arise. Understanding common installation issues and knowing how to troubleshoot them will help ensure your smart heating system runs smoothly from day one.
Typical Problems and Solutions
Even with a clear step-by-step guide, some issues can crop up during hive thermostat screwfix installation. Below are the most frequent problems and how to resolve them.
Thermostat Not Powering Up
- Check batteries if using a wireless model, ensuring they are inserted correctly.
- For wired models, confirm all wires are connected to the correct terminals and are secure.
- Use a voltage tester to verify power at the thermostat and receiver.
Receiver Not Communicating
- Ensure the receiver is positioned near the boiler and within range.
- Double-check wiring for both combi and conventional boilers.
- Look for flashing lights on the receiver, which indicate connectivity status.
- If you encounter a “no signal” error, try turning the power off and on, then re-pairing the receiver and thermostat.
Wi-Fi and App Issues
- Confirm the Hive Hub is properly connected to your router and the Wi-Fi signal is strong at the installation point.
- Restart the router and Hub if the app cannot detect the thermostat.
- Reinstall the Hive app if setup errors persist.
Incorrect Temperature Readings
- Avoid installing the thermostat near heat sources or drafts.
- Relocate the thermostat if readings remain inaccurate.
Troubleshooting Table
| Issue | Quick Fix |
|---|---|
| Thermostat won't turn on | Check power, wiring, and batteries |
| No signal between devices | Re-pair, check wiring, reset receiver |
| Wi-Fi not detected | Move Hub, restart router, check broadband |
| App setup fails | Restart app, check phone compatibility |
For more detailed guidance, especially if you are new to smart heating, the Beginner's guide to smart heating controls is an excellent resource.
When to Call a Professional
Certain hive thermostat screwfix issues require expert attention. If you face complex wiring, unusual heating systems, or repeated faults, it is wise to seek professional help.
Look out for the following warning signs:
- Exposed or damaged wires that could pose an electrical hazard.
- Boiler not responding at all to thermostat commands after following all troubleshooting steps.
- Non-standard or legacy heating systems that do not match typical wiring diagrams.
- UK regulations, such as Part P or Gas Safe, which may require certified installers for legal and safety reasons.
Cost vs. Benefit Analysis
- DIY installation can save money, but repeated errors may lead to costly repairs or voided warranties.
- Professional installation offers peace of mind, adherence to regulations, and expert troubleshooting.
If your hive thermostat screwfix is still not working after all standard checks, do not hesitate to contact a qualified installer. This ensures your heating system is both safe and efficient, protecting your investment and your home.
Optimising Your Hive Thermostat: Tips & Advanced Features
Getting the most from your hive thermostat screwfix setup involves more than just installation. By learning how to fine-tune schedules, integrate with smart home platforms, monitor usage, and keep your system updated, you can unlock significant energy savings and enhance your home comfort. Below, we break down advanced optimisation techniques that every UK homeowner should know.
Customising Schedules and Zones
One of the most effective ways to maximise your hive thermostat screwfix investment is through tailored heating schedules. Start by setting up daily and weekly routines that reflect your household's typical occupancy patterns. For instance, lower temperatures during working hours and warmer settings in the evenings help avoid unnecessary energy use.
If you have a multi-zone system, assign individual schedules to each area. Bedrooms can be kept cooler during the day, while living spaces remain comfortable. This approach not only boosts comfort but also improves energy efficiency. For a detailed look at the possibilities, see Types of smart thermostat features.
Some tips for effective scheduling:
- Use the Hive app’s intuitive interface to create and modify schedules.
- Take advantage of preset templates for quick setup.
- Adjust for seasonal changes, such as higher demand in winter.
By refining your heating zones and schedules, you set the foundation for lower bills and a more comfortable home.
Integrating with Smart Home Ecosystems
The hive thermostat screwfix range is designed to work seamlessly with leading smart home platforms. Integration with Amazon Alexa, Google Assistant, and Apple HomeKit allows you to control heating with simple voice commands or automate routines based on your daily habits.
Setting up these integrations is straightforward:
- Link your Hive account to your preferred voice assistant through the relevant app.
- Create automation routines, such as switching off heating when you leave home or turning it on before you arrive.
- Use geofencing features to trigger heating based on your smartphone’s location.
This level of connectivity means your Hive system becomes part of a broader home automation strategy. Imagine waking up to a warm house without lifting a finger or returning to comfort after a long day. The hive thermostat screwfix system brings these possibilities within easy reach.
Energy Saving and Usage Insights
Monitoring your energy consumption is vital for long-term savings. The Hive app provides detailed insights into your heating use, allowing you to spot trends and identify opportunities to reduce waste. You can view daily, weekly, and monthly reports to see when your home uses the most energy.
With hive thermostat screwfix, you can:
- Receive personalised energy-saving tips based on your usage patterns.
- Set targets for reduced consumption and track your progress.
- Compare your efficiency over time and adjust schedules accordingly.
For an in-depth discussion of the advantages, visit Benefits of installing a smart thermostat. Real-world feedback shows that many UK households report lower bills and increased control after switching to Hive.
Maintenance, Updates, and Security
To ensure your hive thermostat screwfix system remains reliable and secure, regular maintenance is essential. Always keep your thermostat’s firmware up to date to benefit from the latest features and security patches.
Best practices include:
- Checking for software updates via the Hive app regularly.
- Replacing batteries in wireless models as soon as you receive a low-battery alert.
- Ensuring your home Wi-Fi network is secure to protect your system from unauthorised access.
Data privacy is also important. Hive uses encrypted connections to keep your information safe. Following these steps will help maintain peak performance and peace of mind for your heating system.
Professional Support and Upgrades
Even with the most user-friendly features, there may be times when you need expert help with your hive thermostat screwfix installation or operation. Hive offers comprehensive customer support through online resources, live chat, and phone assistance.
Consider professional servicing if you experience persistent issues or plan to expand your system with add-ons like smart radiator valves or additional sensors. Upgrading your system can further enhance comfort and efficiency, especially in larger homes or changing family situations.
With regular updates and access to professional advice, your hive thermostat screwfix can adapt to your evolving needs for years to come.
Frequently Asked Questions about Hive Thermostat Installation
Smart heating technology is transforming UK homes, and questions about the hive thermostat screwfix are common among both new users and experienced DIYers. Here, we answer the most frequent queries to help you install and optimise your Hive system with confidence.
Do I need professional installation for Hive thermostats?
Most hive thermostat screwfix models are designed for straightforward DIY installation, especially wireless versions. However, if your heating system has complex wiring or you are unsure about UK electrical regulations, hiring a certified professional is recommended. For installations involving mains wiring, compliance with Part P of the Building Regulations is essential.
Can I use Hive with any boiler or heating system?
Hive thermostats from Screwfix are compatible with most combi, system, and conventional boilers found in UK homes. Check your boiler’s make and model before purchasing. For older or non-standard systems, review the compatibility checklist provided by Hive or consult a heating engineer to ensure seamless integration.
What are the ongoing costs and subscription requirements?
Using the hive thermostat screwfix does not require an ongoing subscription for basic heating control features. Optional add-ons, such as Hive Heating Plus, provide enhanced analytics and energy insights for a monthly fee. Always review the latest offerings at Screwfix and on the Hive website for updates to subscription services.
How do I reset or re-pair my Hive thermostat?
To reset your hive thermostat screwfix, press and hold the central dial until the menu appears, then select ‘Reset’. For re-pairing, follow the instructions in the Hive app to connect your thermostat to the receiver and hub. If issues persist, consult the troubleshooting section in your user manual or seek assistance from Hive support.
What should I do if my heating is not responding after installation?
First, check that the receiver and thermostat are correctly paired and that your boiler is powered on. Ensure all wiring is secure. If the hive thermostat screwfix still does not activate your heating, try restarting the system. Persistent problems may require professional assessment, especially if you suspect wiring or component faults.
Are there any government incentives or grants for smart heating in 2026?
As of 2026, various UK schemes encourage smart heating adoption to reduce carbon emissions. Eligibility and funding can change, so consult government websites or local councils for the latest information. Smart thermostats like Hive are often highlighted for their role in energy efficiency and cost savings, supporting national sustainability goals.
How does Hive compare to other smart thermostats available at Screwfix?
Hive leads the market due to its user-friendly interface, wide compatibility, and robust mobile app. According to UK Smart Thermostat Adoption Statistics, Hive enjoys high user satisfaction, with many reporting significant savings on energy bills. Compare features and reviews at Screwfix to determine the best fit for your home.
Quick solutions for the most common user queries
- Ensure your Wi-Fi connection is strong where the hub is located.
- Use the latest version of the Hive app for optimal performance.
- Replace thermostat batteries regularly for wireless models.
- Follow all safety procedures when handling wiring.
- Review the Screwfix product page for customer tips and updates related to hive thermostat screwfix.
Now that you’ve explored the step by step process of choosing and installing your Hive Thermostat using Screwfix’s options, you can see how smart heating controls are reshaping comfort and efficiency in UK homes. If you’re keen to make the most of these benefits but want assured results, remember that Castle Heating Kent’s experienced, Gas Safe registered engineers are here to help. Whether you need expert installation, troubleshooting, or ongoing support, you can trust us to keep your home running smoothly and efficiently.
Keeping Homes in and around kent Warm, Dry & Flowing Book with castle heating kent
